Cloudflare WAF (Part 1): Setting Up a Lab with Workers and Custom Rules
Cloudflare WAF (Part 1): Setting Up a Lab with Workers and Custom Rules
I’ve been meaning to get some hands-on experience with Cloudflare’s Web Application Firewall (WAF). Since I already had a spare domain (harripersad.org) in my Cloudflare account, I decided to turn it into a quick lab.
This is Part 1, where I set up the basics:
- A Cloudflare Worker as my “origin” (no server needed).
- DNS and routing so both root and
wwwresolve. - A few free-tier custom rules to block suspicious traffic.
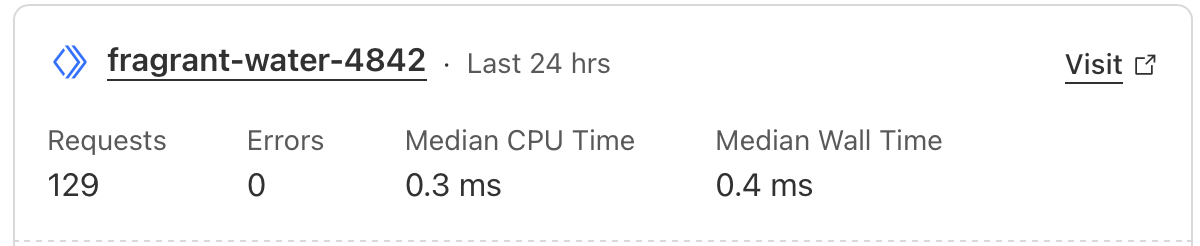
Setting up a Worker
Instead of spinning up a VM, I used Cloudflare Workers. A Worker is a tiny serverless function that runs at the Cloudflare edge. Mine just returns a “Hello World” response, but that’s enough for testing.
Screenshot: Worker setup
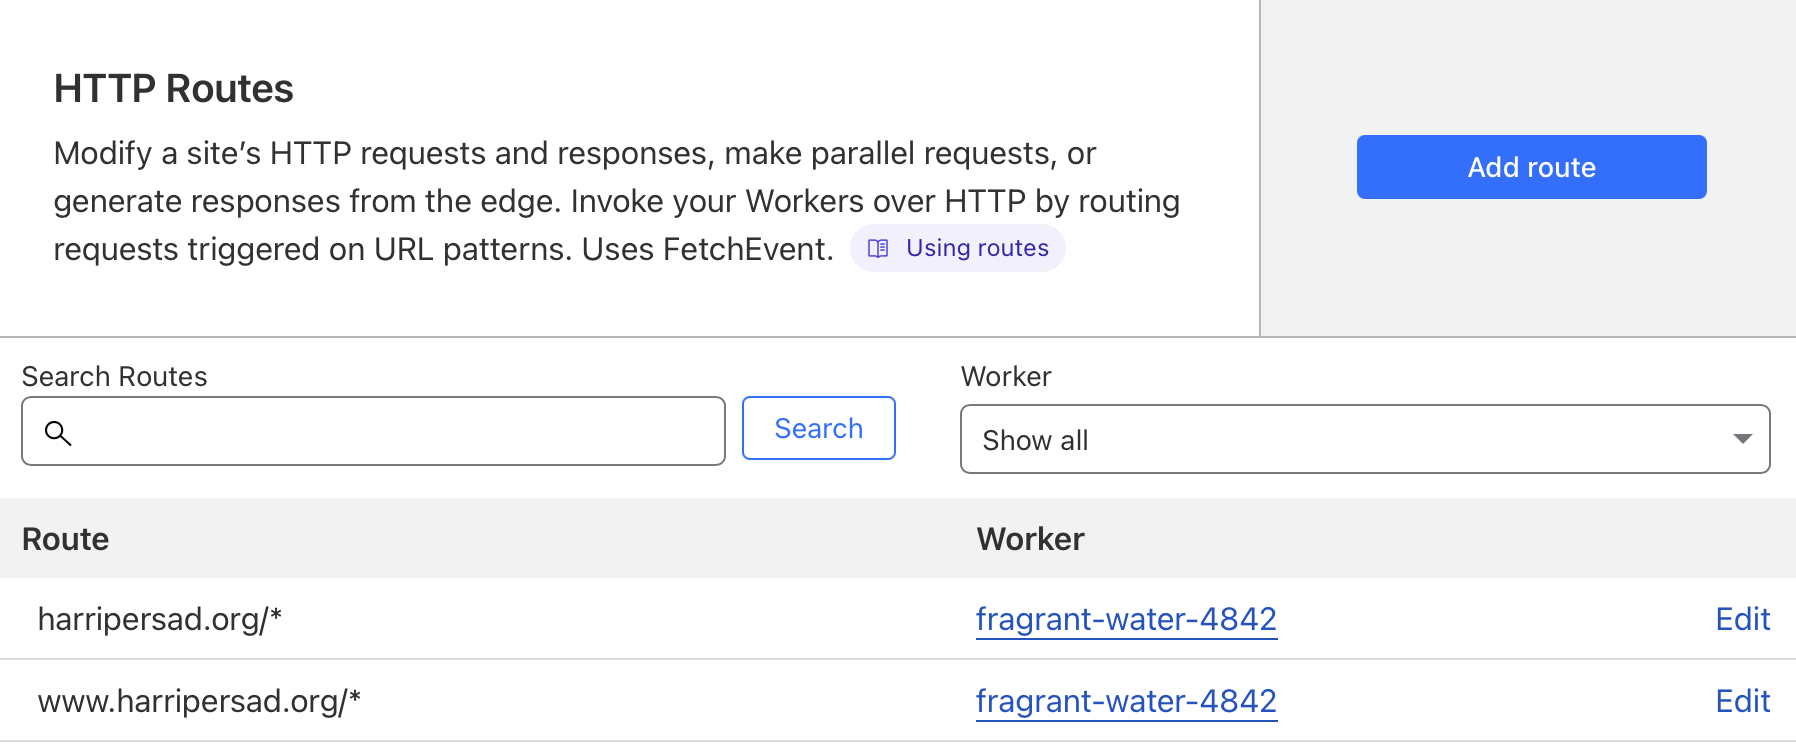
Binding the Worker to the Domain
Next, I needed my Worker to respond on harripersad.org and www.harripersad.org.
You can do this in two ways:
- Custom Domains (simpler: bind
harripersad.orgdirectly to the Worker). - Routes (more flexible: e.g.
harripersad.org/*,www.harripersad.org/*).
Screenshot: Custom route configuration
DNS Management
Since I don’t have a real webserver behind the domain, I added a dummy A record pointing to 192.0.2.1 (a reserved test IP). With Cloudflare proxying (orange cloud), the Worker intercepts traffic before it ever tries to connect to that IP.
A @ 192.0.2.1 ProxiedCNAME www harripersad.org Proxied
Screenshot: DNS management

Creating Custom Rules
On the Free plan, Cloudflare doesn’t provide Managed WAF rules (that’s Pro+), but you still get Custom Rules. Here are three I set up:
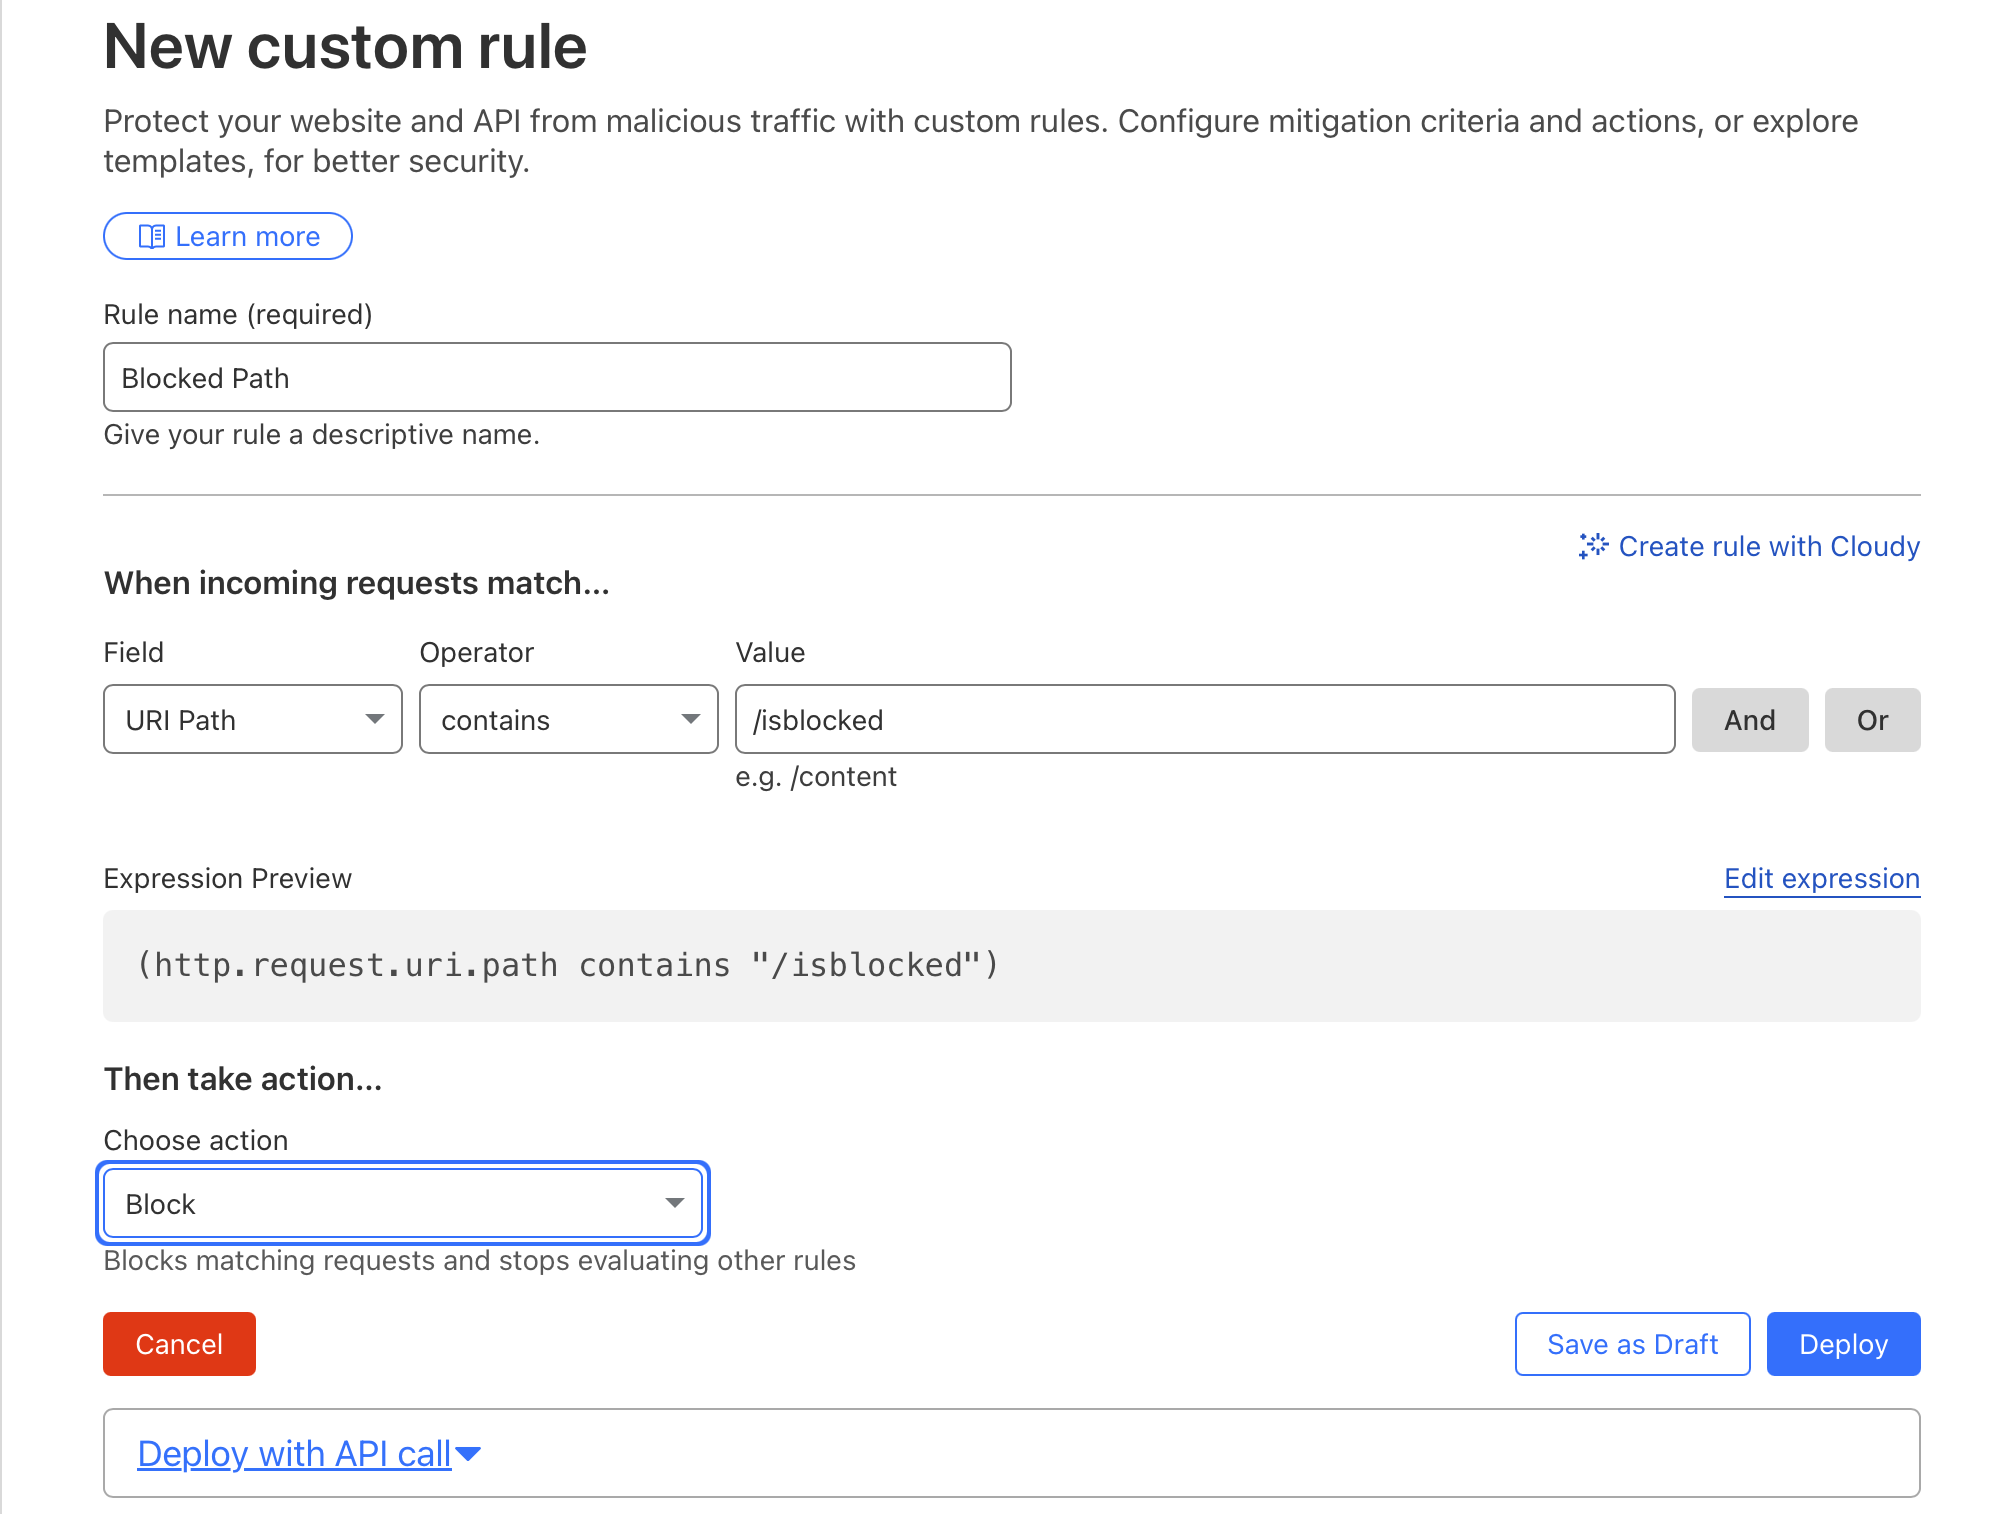
Rule 1: Block /blocked Path
- Field: URI Path
- Operator: contains
- Value:
/blocked - Action: Block
Screenshot: Rule 1 setup
Test:
1
curl -i https://harripersad.org/isblocked
Screenshot: Rule 1 test 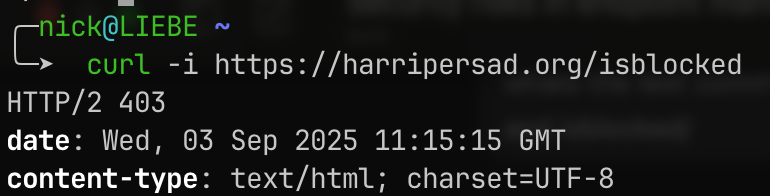
—
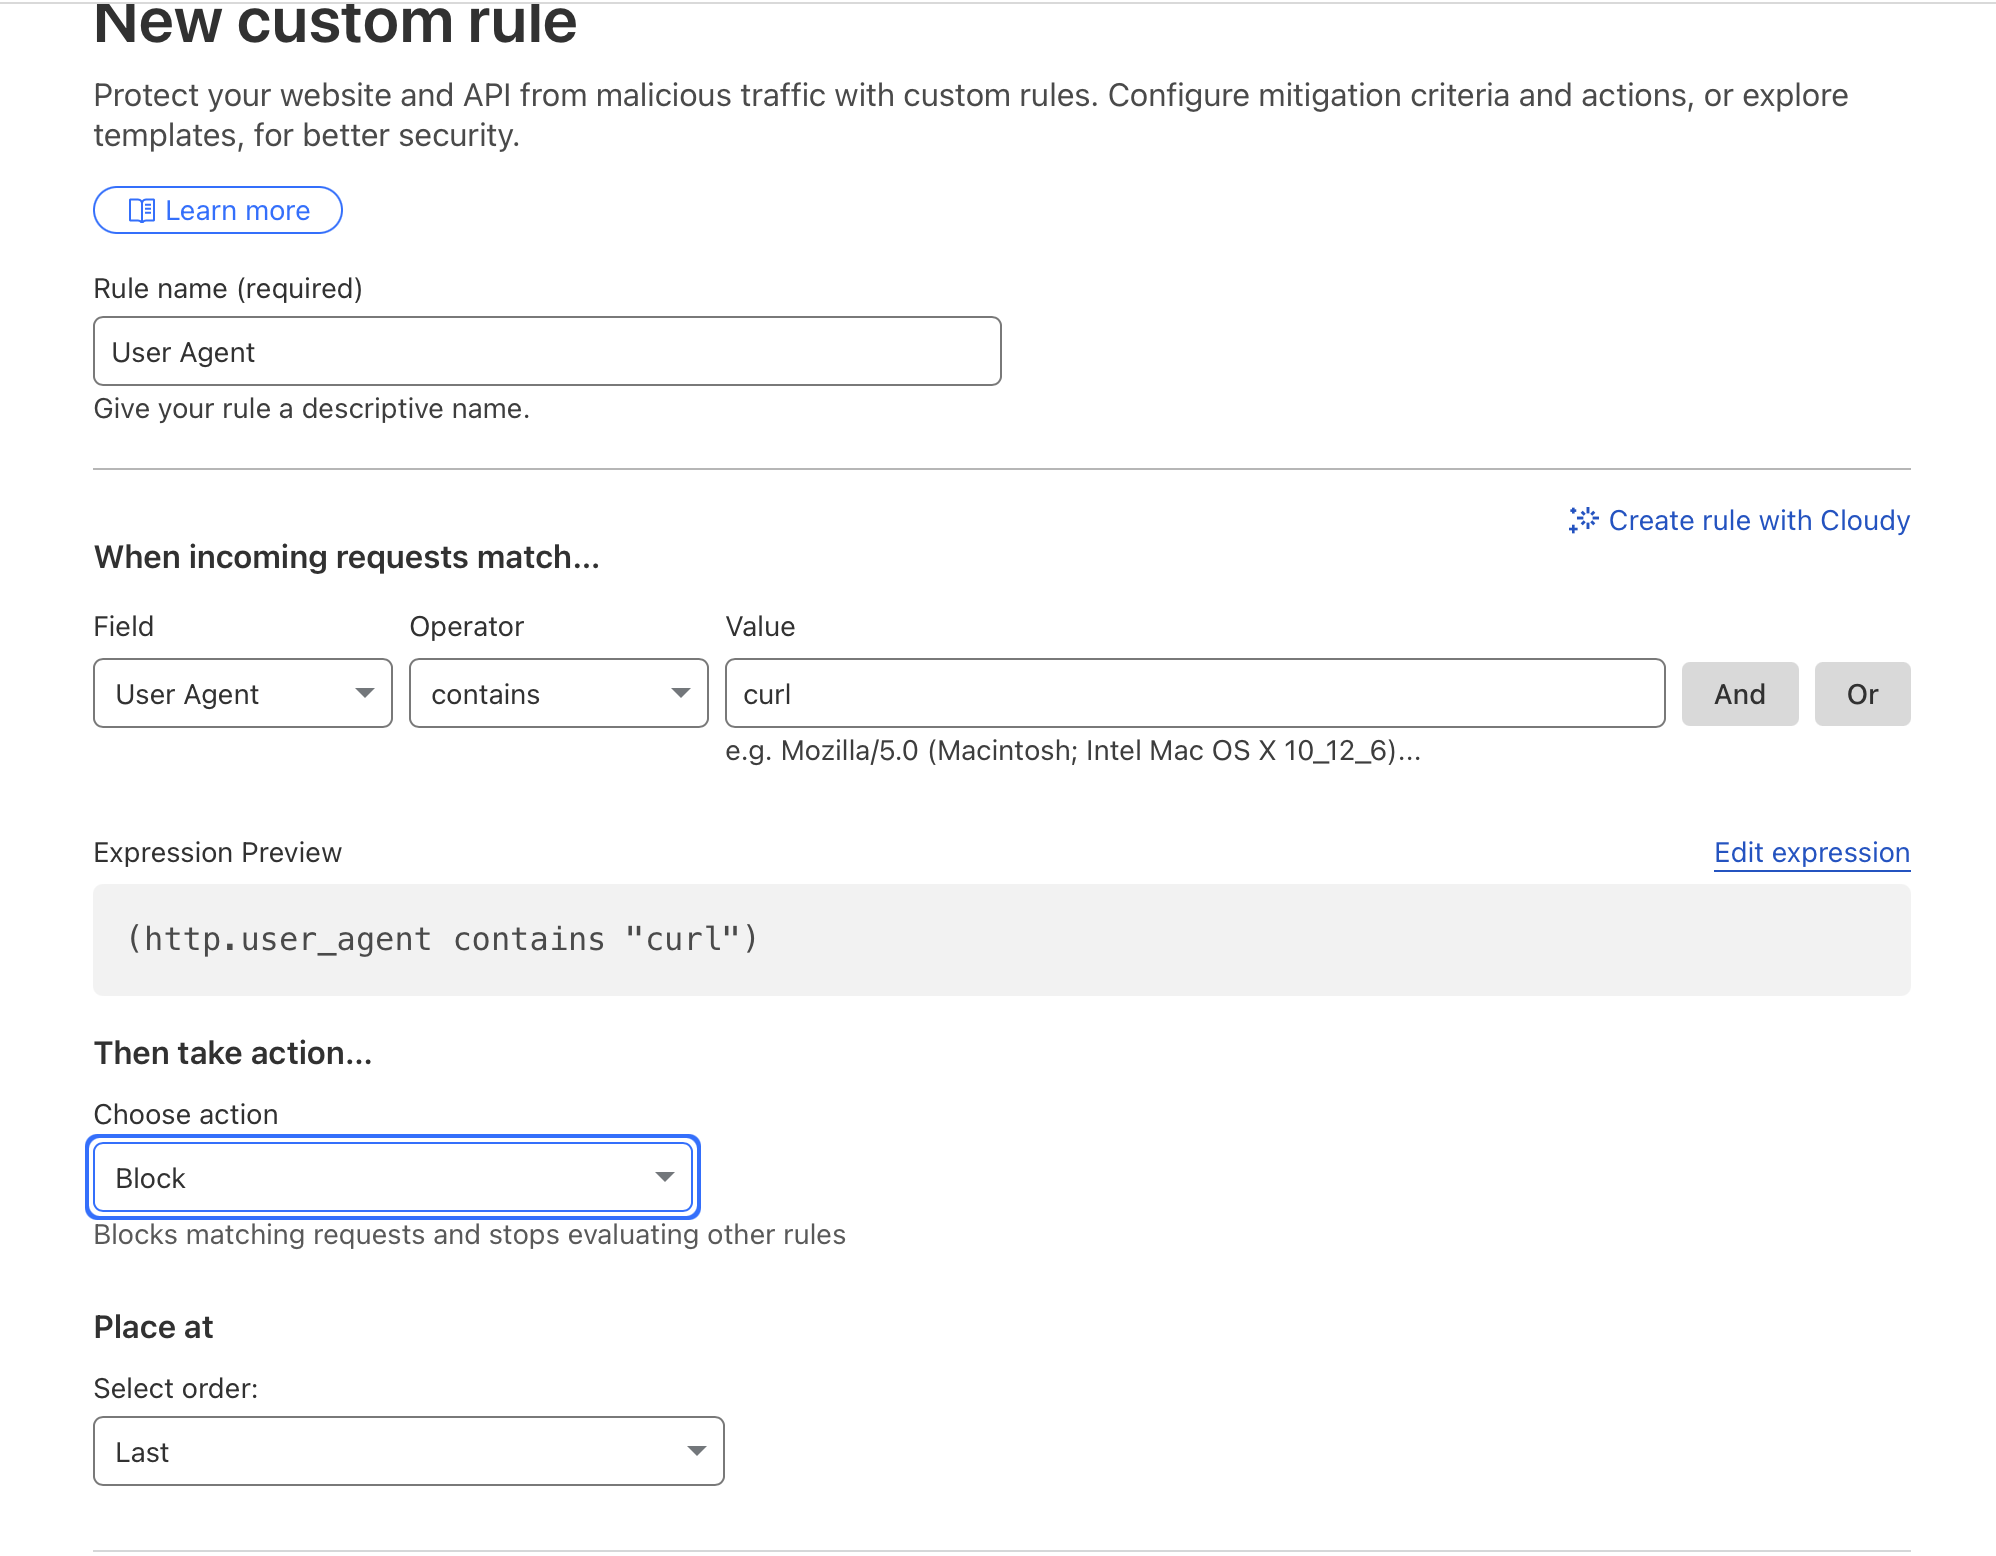
Rule 2: Block curl User-Agent
- Field: User Agent
- Operator: contains
- Value:
curl - Action: Block
Screenshot: Rule 2 setup
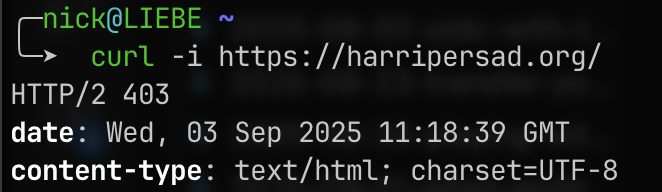
Test:
1
curl -i https://harripersad.org/
Screenshot: Rule 2 test
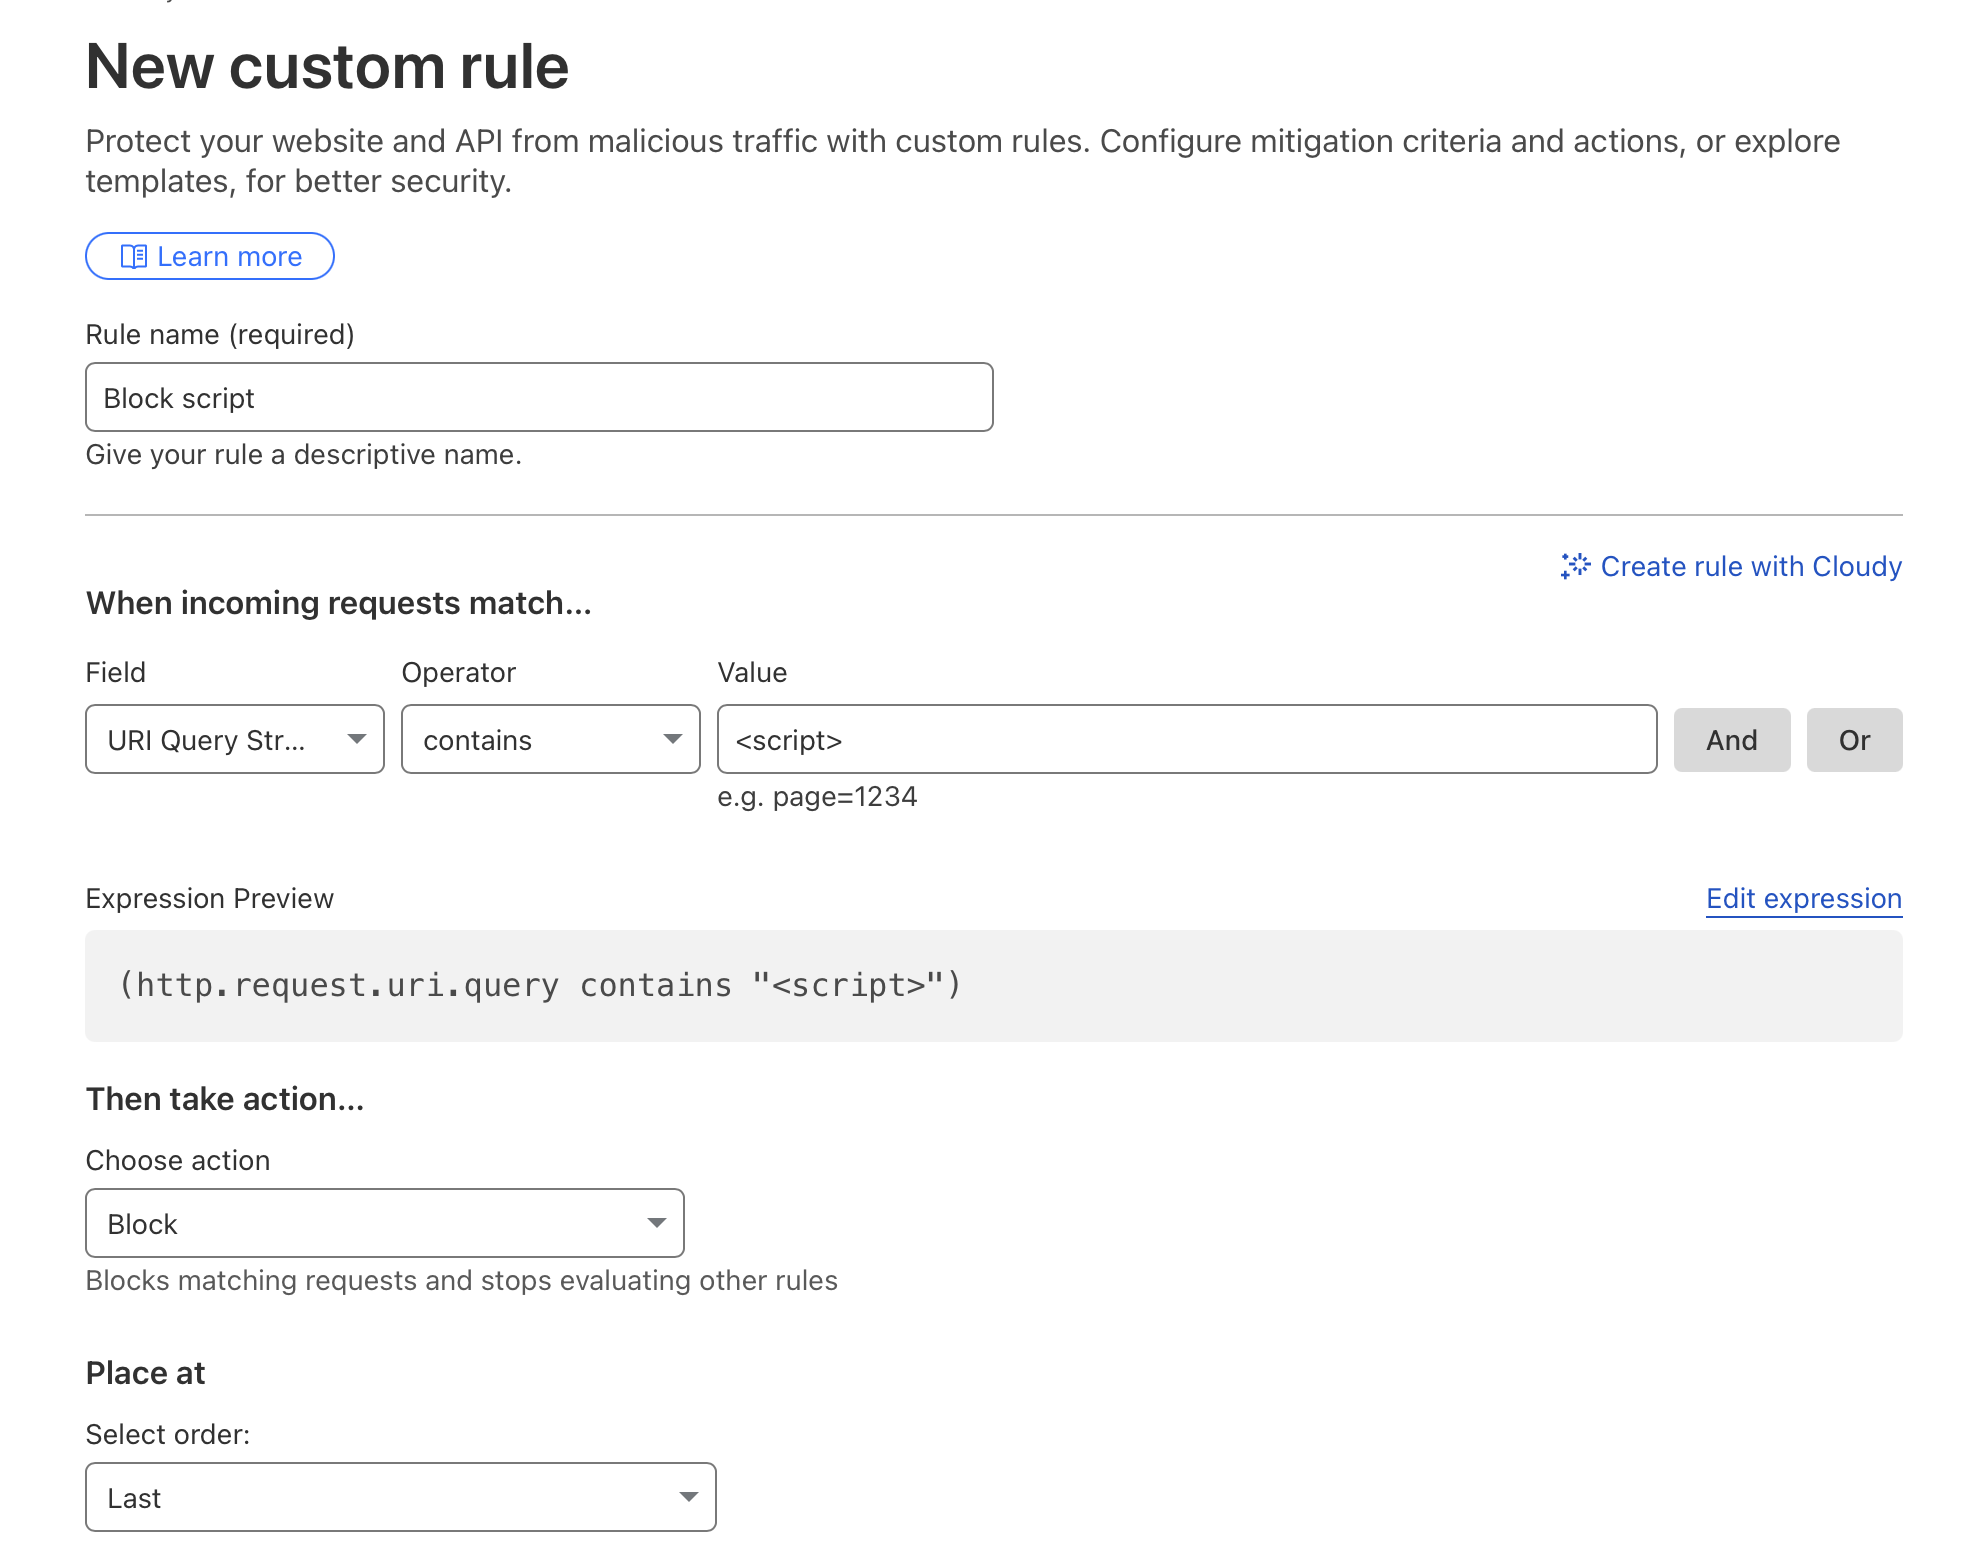
Rule 3: Block <script> in Query String
- Field: URI Query
- Operator: contains
- Value:
<script> - Action: Block
Screenshot: Rule 3 setup
Test:
1
curl -i "https://harripersad.org/?q=<script>alert(1)</script>"
Screenshot: Rule 3 test

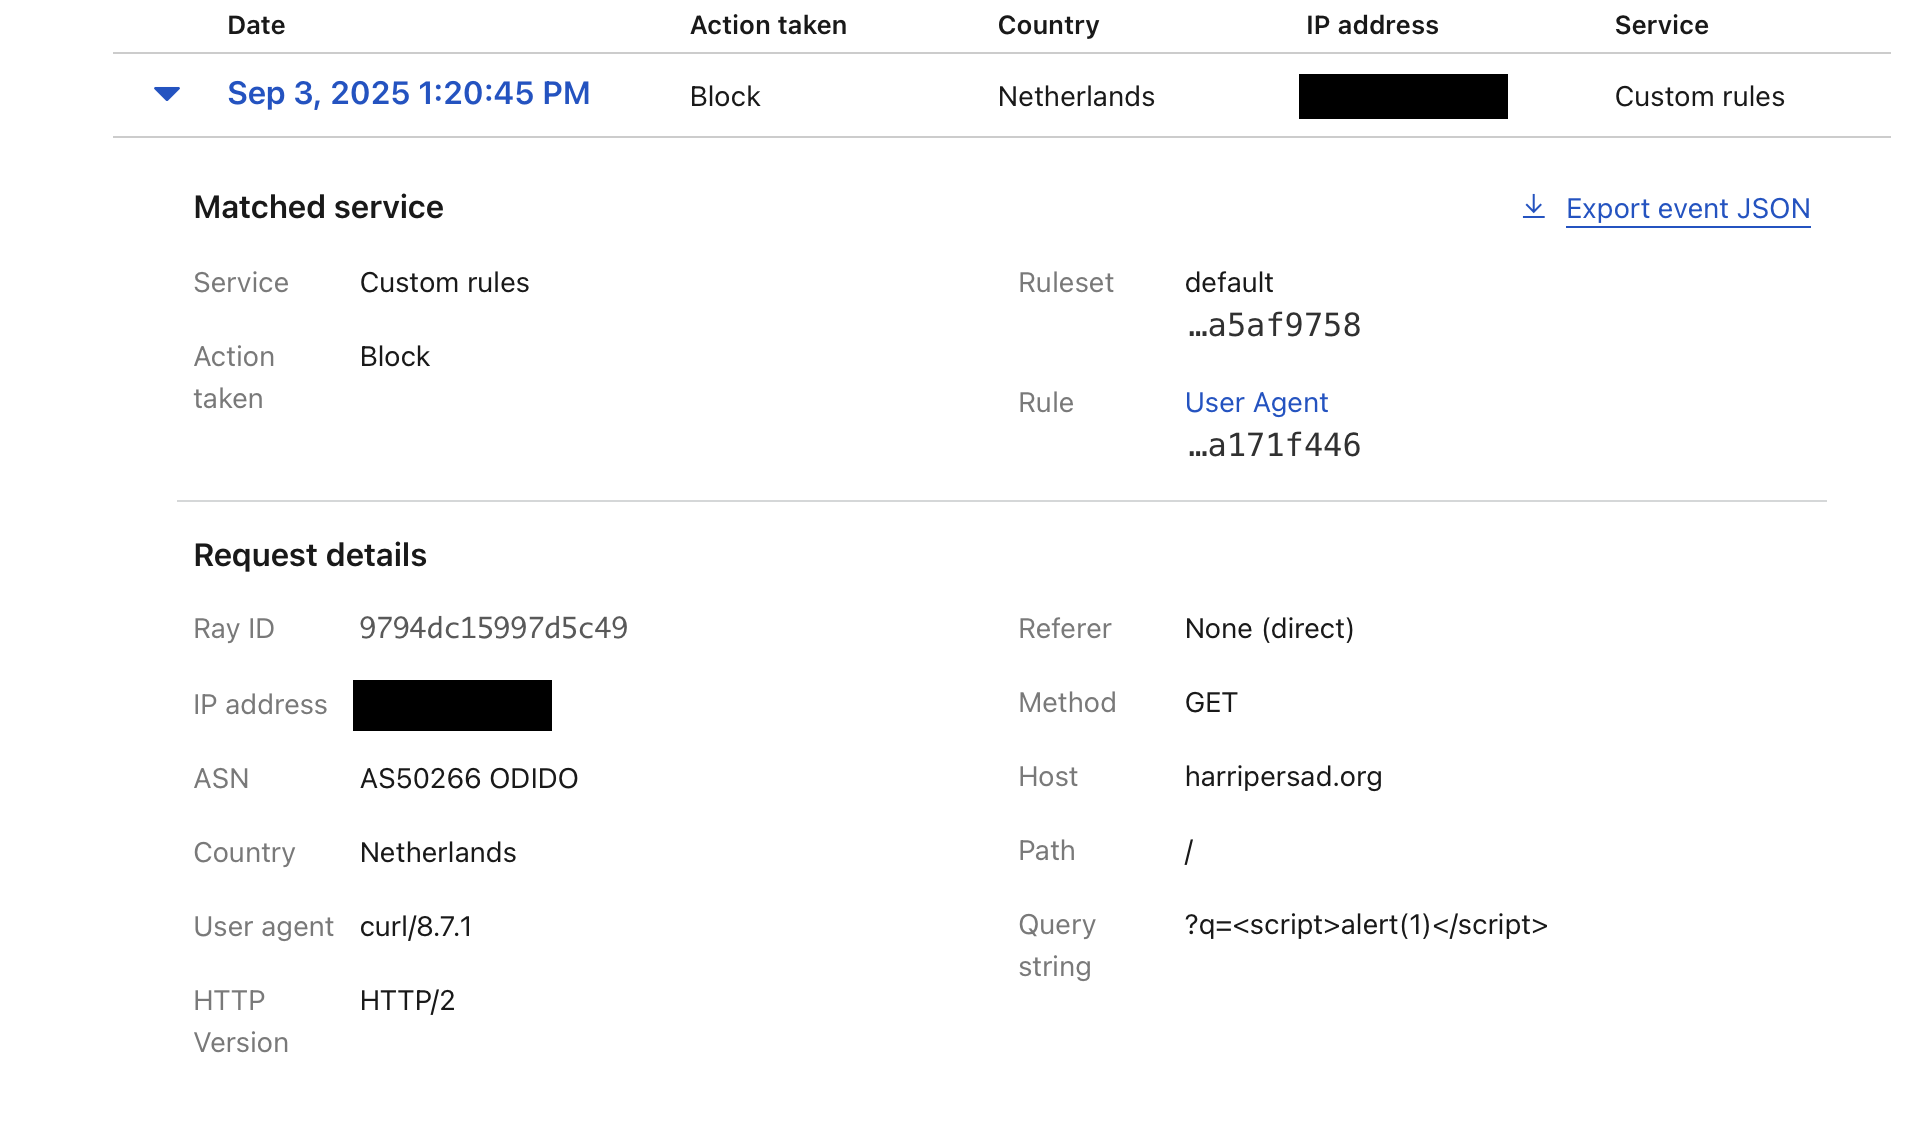
Observing the Results
Finally, I checked Security → Events in the Cloudflare dashboard. All my test requests appeared there with the right Rule Name, Action: Block, and request details.
Screenshot: Security Events
Closing Thoughts
With this setup, I’ve got a working WAF lab on a spare domain — all on the Free Cloudflare plan. It’s enough to:
- Practice writing custom rules.
- See how requests are logged and blocked.
Whats next Part 2?
- Migrate to terraform for rule creation
- Test for specific rules
- Test paid functionality? :)